1. >Sinking the SS United States

    A nice article on the latest developments to turn the SS United States into the world’s largest underwater reef in Florida. Earlier this year I dived the U.S.S. Spiegel Grove and U.S.S. Vandenberg. Sizable ships in their own right. It’s hard to convey just how big they feel as you descend upon them. The SS United is nearly double the length of both.

    Imagine descending on this massive ship and spending 30 minutes exploring its top deck. Your first dive will only scratch the surface, and only about one percent of the structure will have been explored. Now imagine coming back and diving through the promenade deck, down cavernous hallways, into cargo holds and bridge structures. Divers will be able to visit this site 100 times and not see the same area twice.

    There’s been a fair amount of controversy in turning the SS United States into an underwater reef, with several historical societies arguing against the project. However, after being docked for 30 years in Philadelphia with no progress on a land-based solution, a permanent resting place underwater (with a small museum onshore) seems a fine compromise. I’m excited to dive it. If all goes to plan, planners will sink the ship 21 nautical miles southwest of Destin-Fort Walton Beach to coincide with the annual DEMA dive show this November.


  2. Dive #63 (2025): Anchor Farm

    Dive log

    Stats

    • Max Depth: 25.1 m / 82 ft
    • Average Depth: 20.2 m / 66 ft
    • Duration: 45 minutes
    • Water Temp: 12.0°C / 54°F
    • Gas: EAN32
    • Tank(s): HP100
    • Pressure Start: 234 bar / 3400 psi
    • Pressure End: 55 bar / 800 psi
    • Surface Consumption Rate: 15.92 L/min / 0.56 cf/min

    Notes

    Dive Summary: A 40-minute dive to 80ft at Anchor Farm in challenging (< 5ft) visibility. The dive itself was a reminder of several key lessons in preparation and equipment management. The two most important reminders: you can never over prepare for a dive, and the ocean always keeps you humble.

    Lesson 1: Fatigue & Preparation Don’t Mix: It’s not ideal to sign up for an early boat dive after hosting a Halloween sleepover. I arrived tired, disorganized, and immediately realized I’d forgotten my rock boots. No matter, the neoprene socks attached to my drysuit would suffice for a boat dive. But this lack of focus was clear in my gear prep as well: I had neglected to label my Enriched Air tanks after picking them up. This created unnecessary uncertainty for a 40-minute dive planned at 80 feet, where the difference between air (35 min NDL) and 32% (50 min NDL) is significant.

    Lesson 2: Test Buoyancy Changes in a Controlled Setting: My primary in-water issue was buoyancy. I had just switched to a stainless steel backplate to compensate for increased ballast requirements of my new drysuit. I thought I had the math worked out correctly by dropping 4lbs in trim weights while adding 4 with the switch to a stainless steel plate from my old Deep Sea  Supply (RIP) Kydex plate. This was a mistake. I miscalculated by about 2-3 lbs. A deep dive with (turns out) low visibility is not the place to test a new setup. I was light on descent and, more embarrassingly, was positively buoyant enough that on ascent (with 1000psi) that I had to use the anchor line to manage my ascent (a no-no in GUE circles).

    Lesson 3: Know Your Computers’ Settings: This was my first dive with a new Shearwater Perdix 2, backed up by my Garmin Descent Mk3. Mid-dive, they gave conflicting information. At 35 minutes, the Garmin warned of approaching NDLs and entered deco, while the Shearwater (and my own dive plan) correctly showed 10+ minutes remaining. Back on the boat, I realized my error: I had left the Garmin on a conservative gradient factor from a pre-flight dive the week before (75 vs. 85).

    Dive Notes: Despite the self-inflicted challenges, the dive site itself was beautiful. We dropped down the line into green darkness. At the bottom, the massive anchors, covered in Metridium, loomed out of the 5-foot viz. We finned a slow, clockwise pattern around the structures about 3 times, accommodating several macro photographers in the group. A good dive, but a better classroom. Lessons learned.

    Given the challenges of the first dive, I opted to sit out the second dive of the day. I believe in over 2,000 dives, this is the first time I’ve done that.


  3. October 25, 2025 - San Diego

    In the San Diego Airport after a week in San Diego. A work conference followed by a dive trip off Catalina with the Sundiver Express. I logged 3 dives. Here’s a short edit of the highlights.

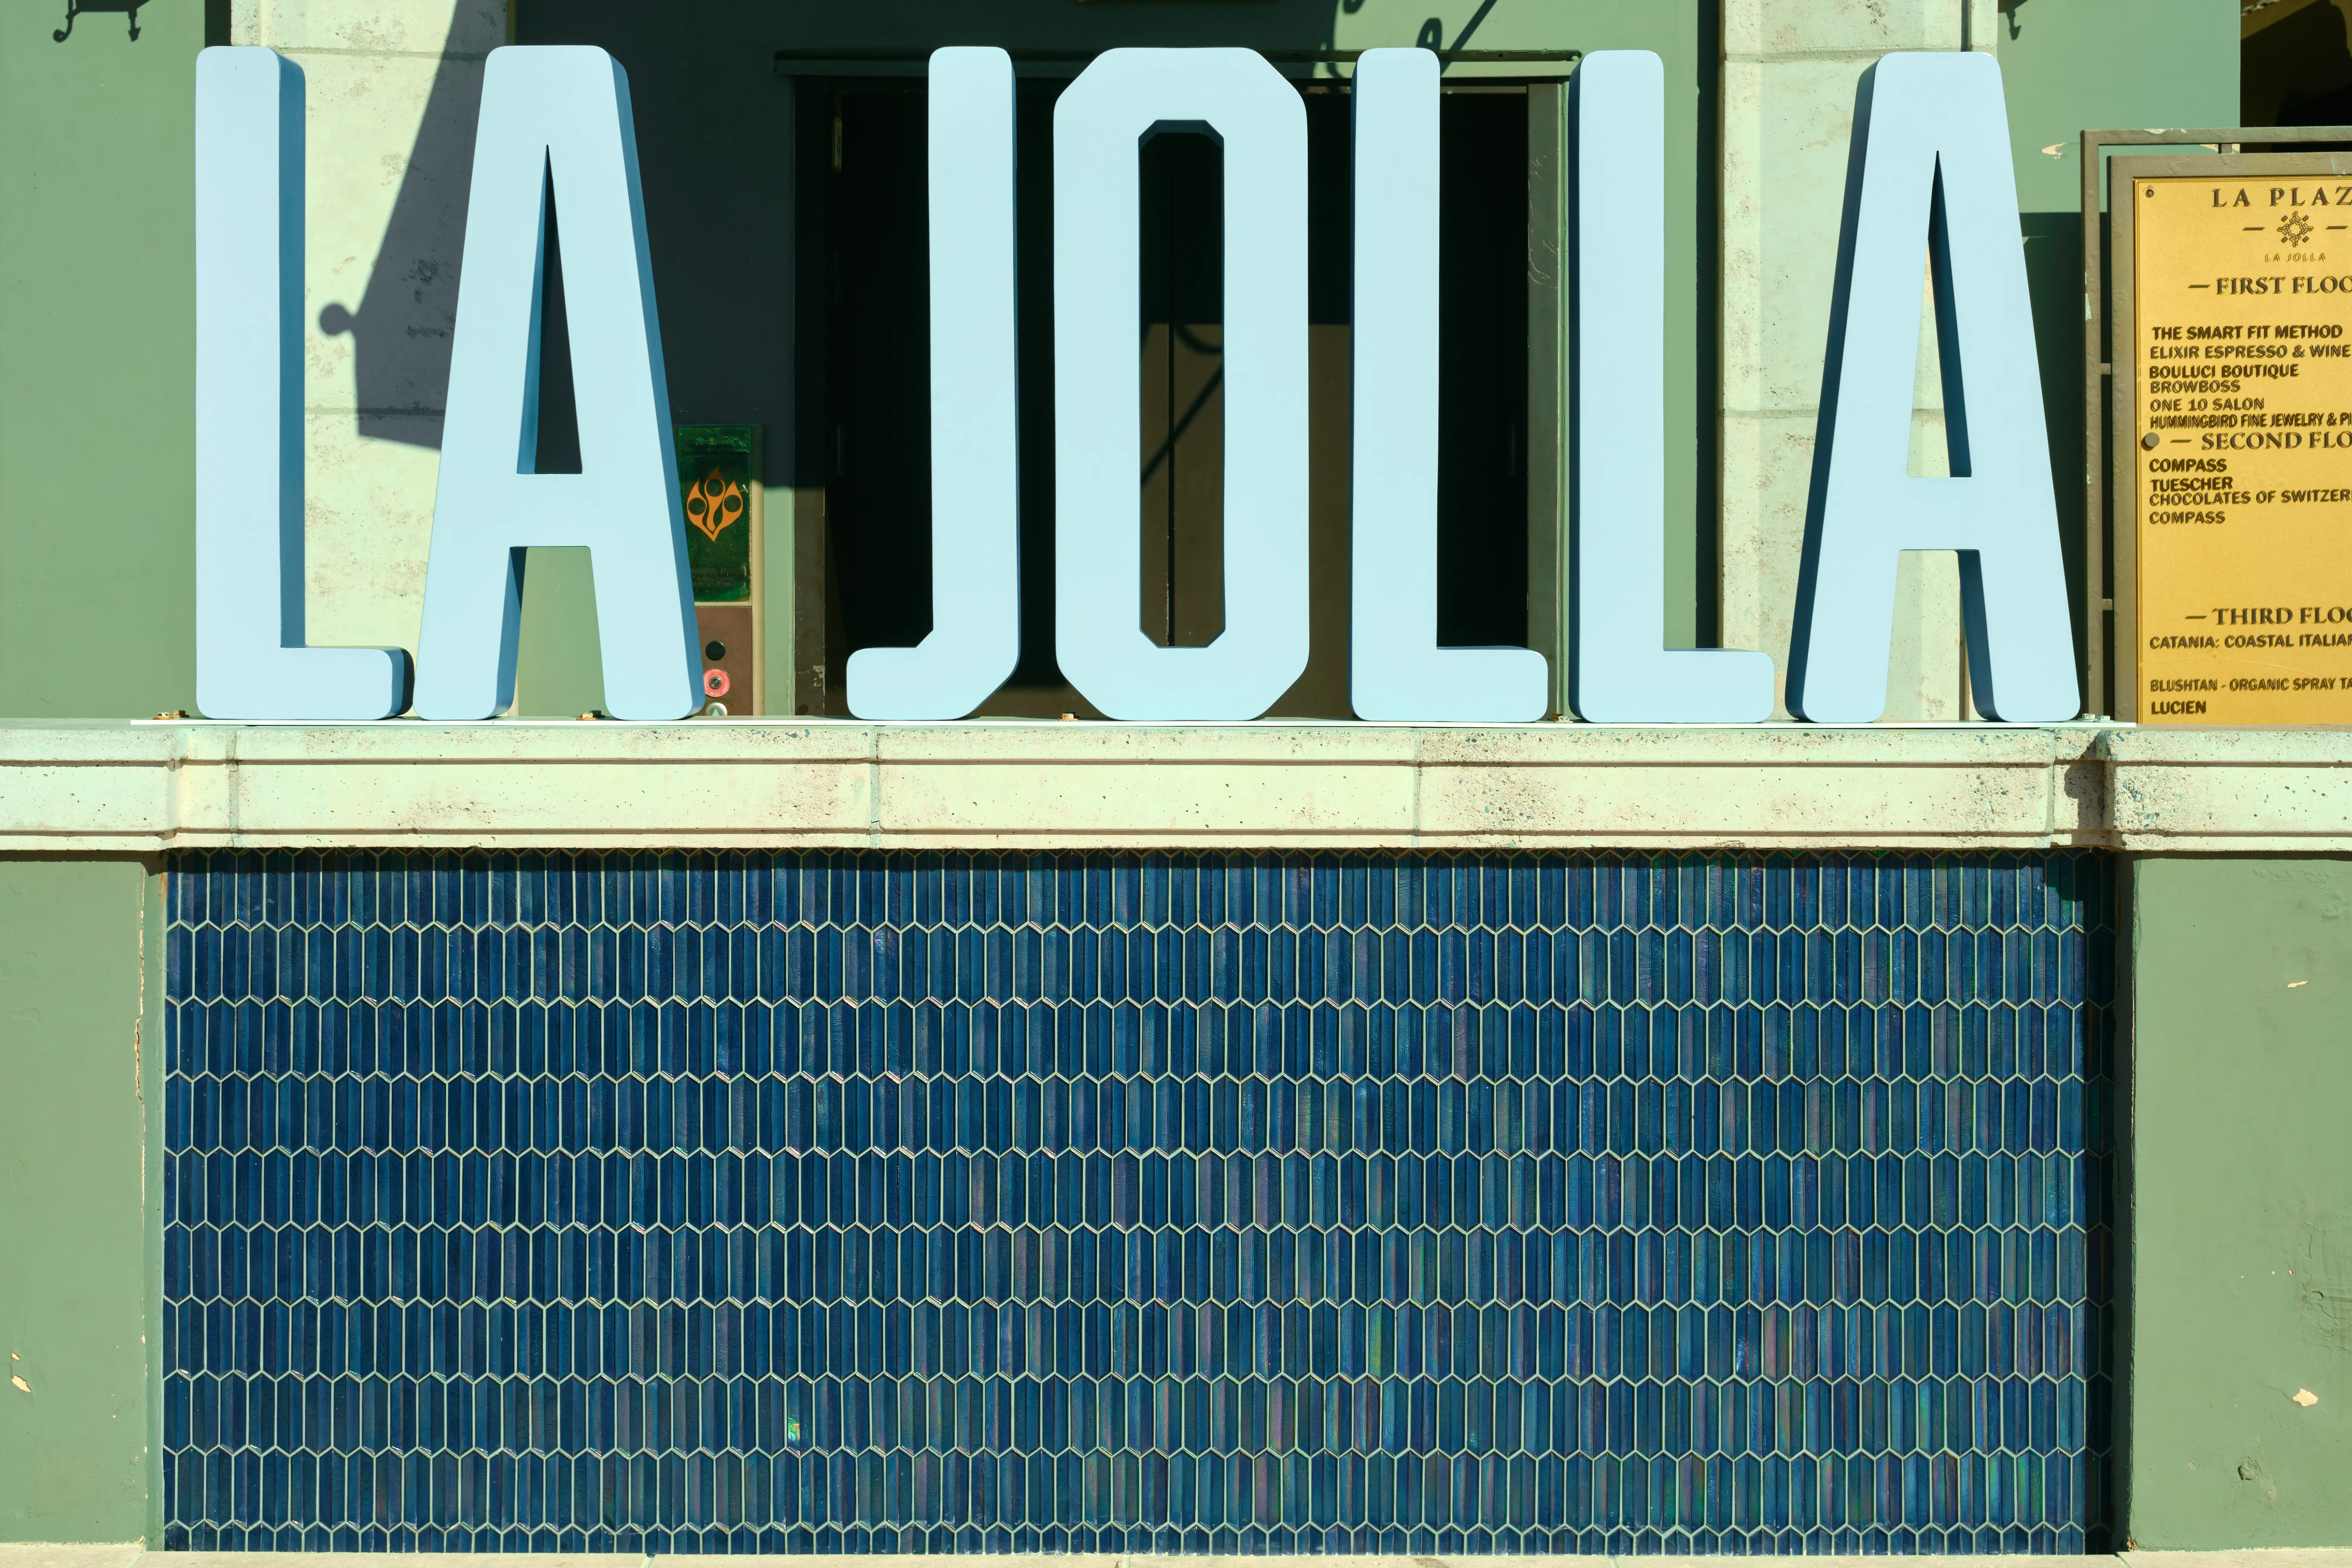
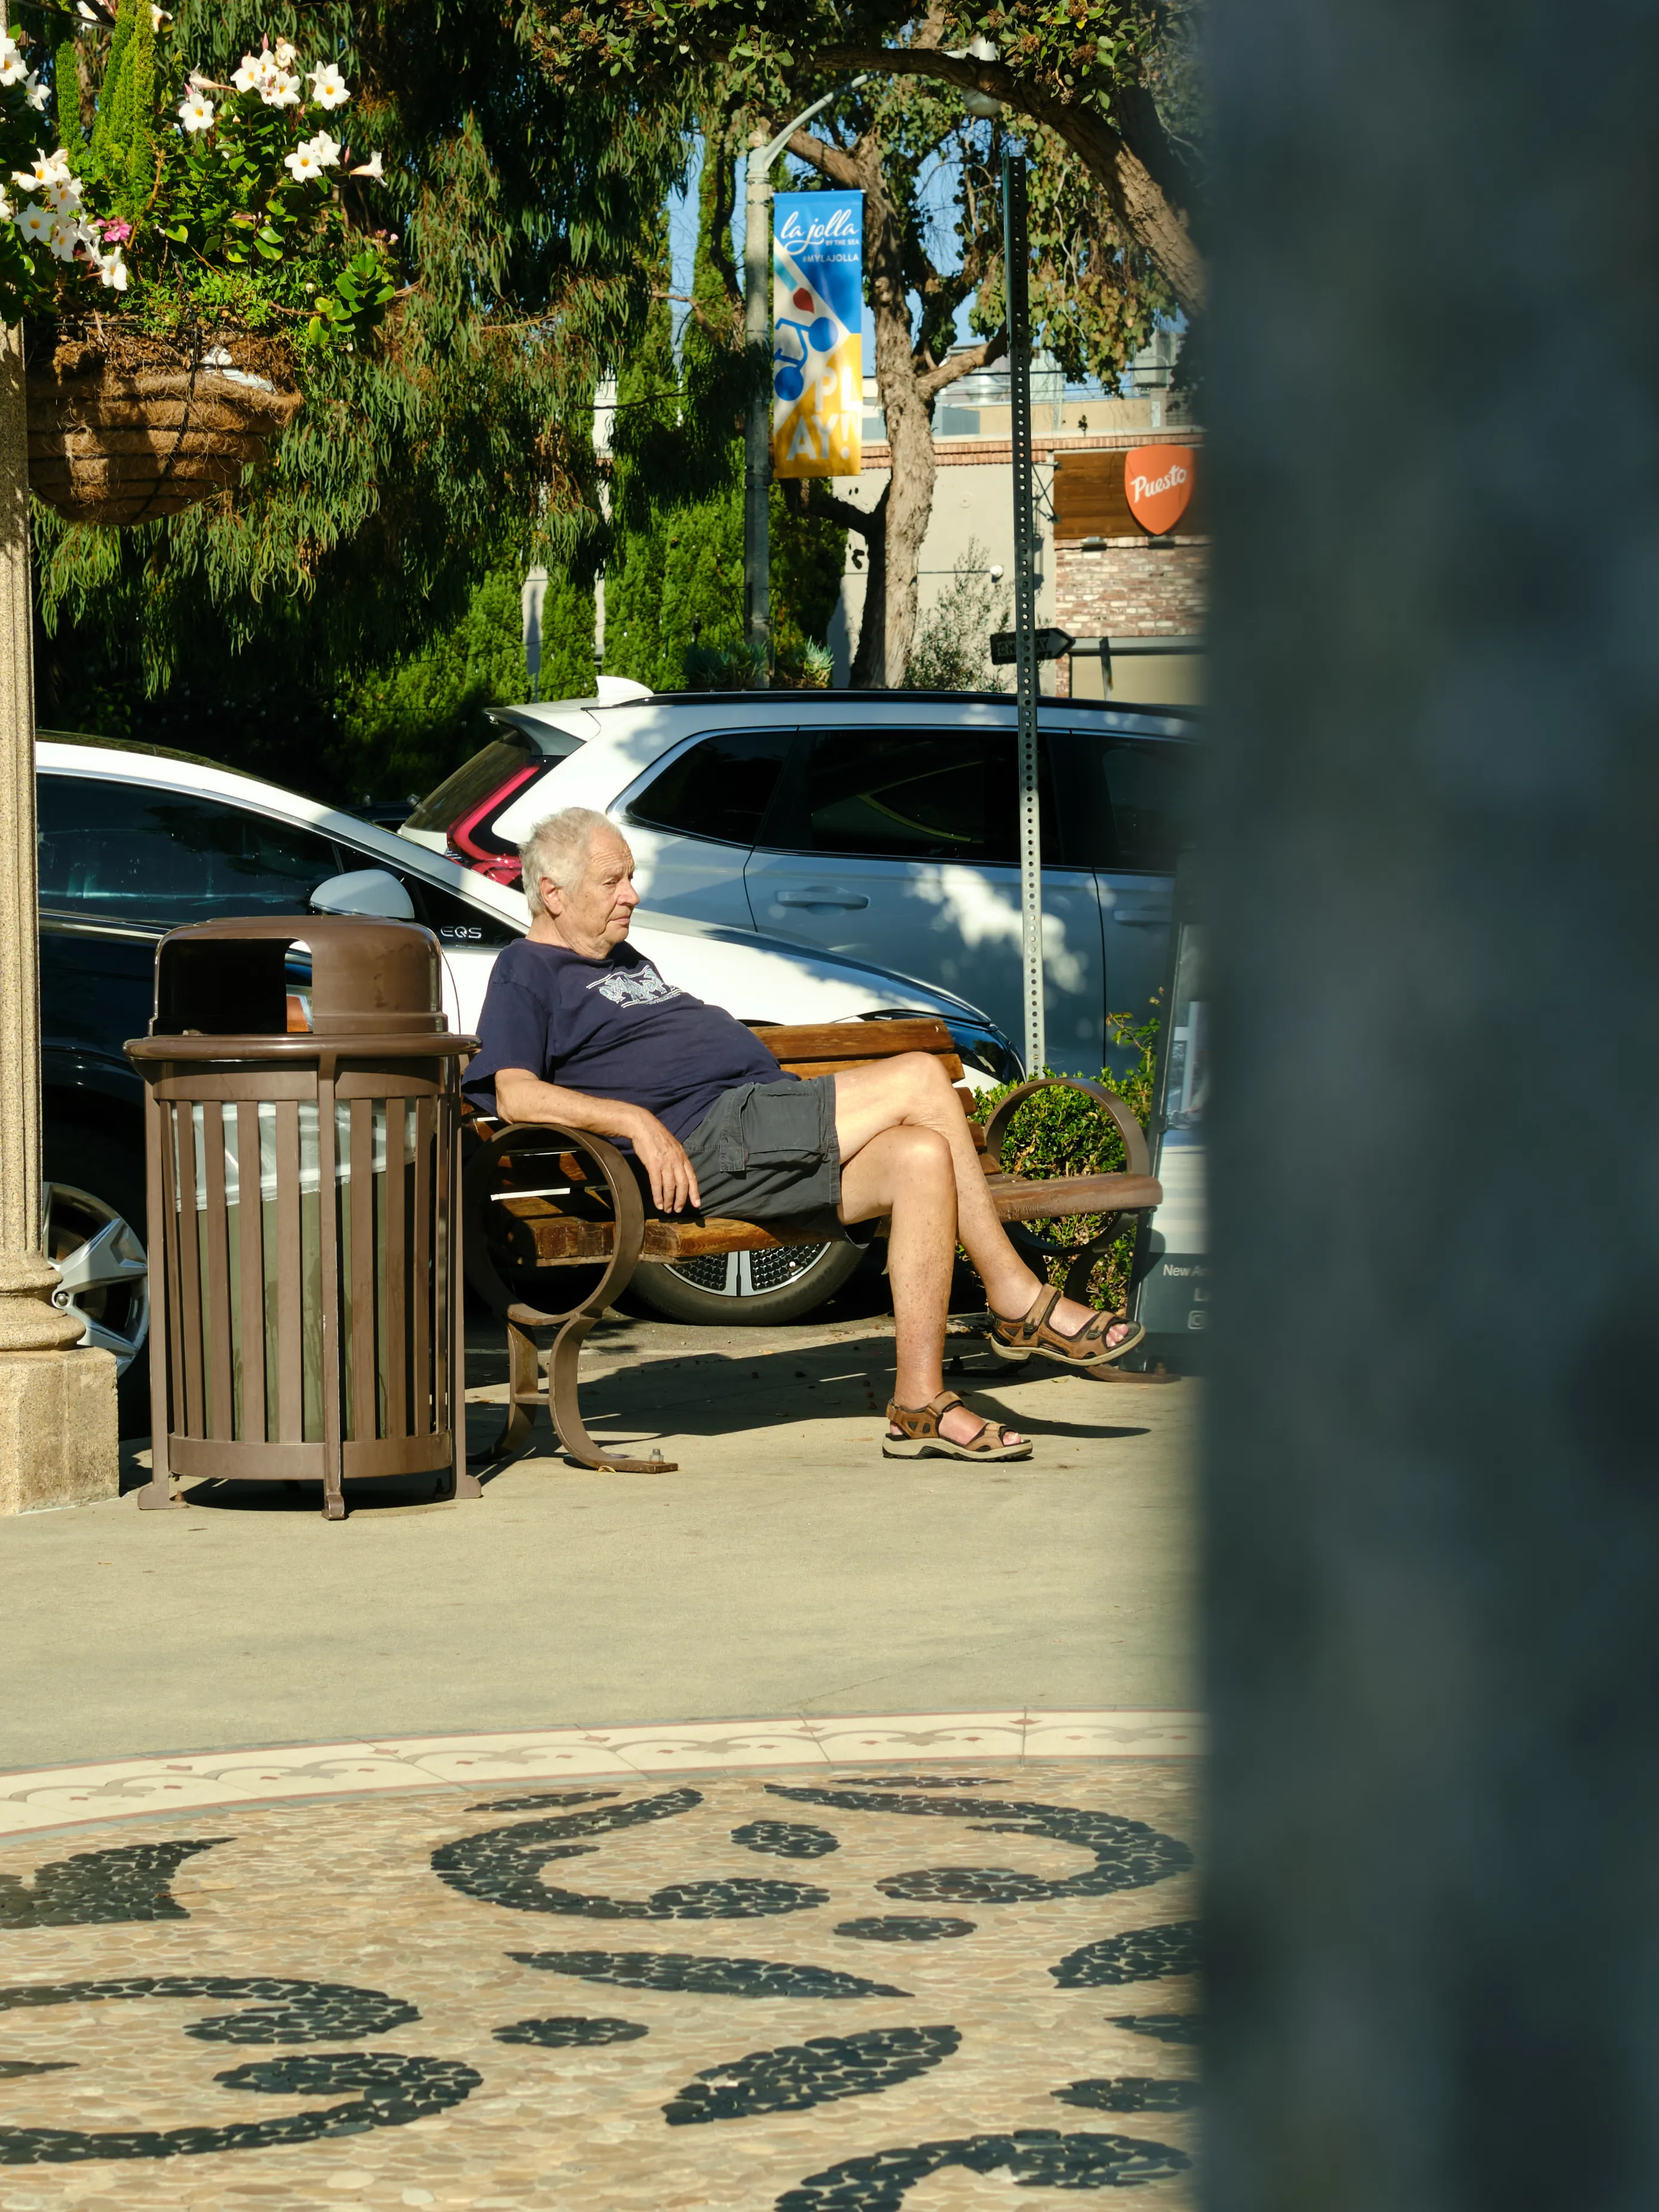
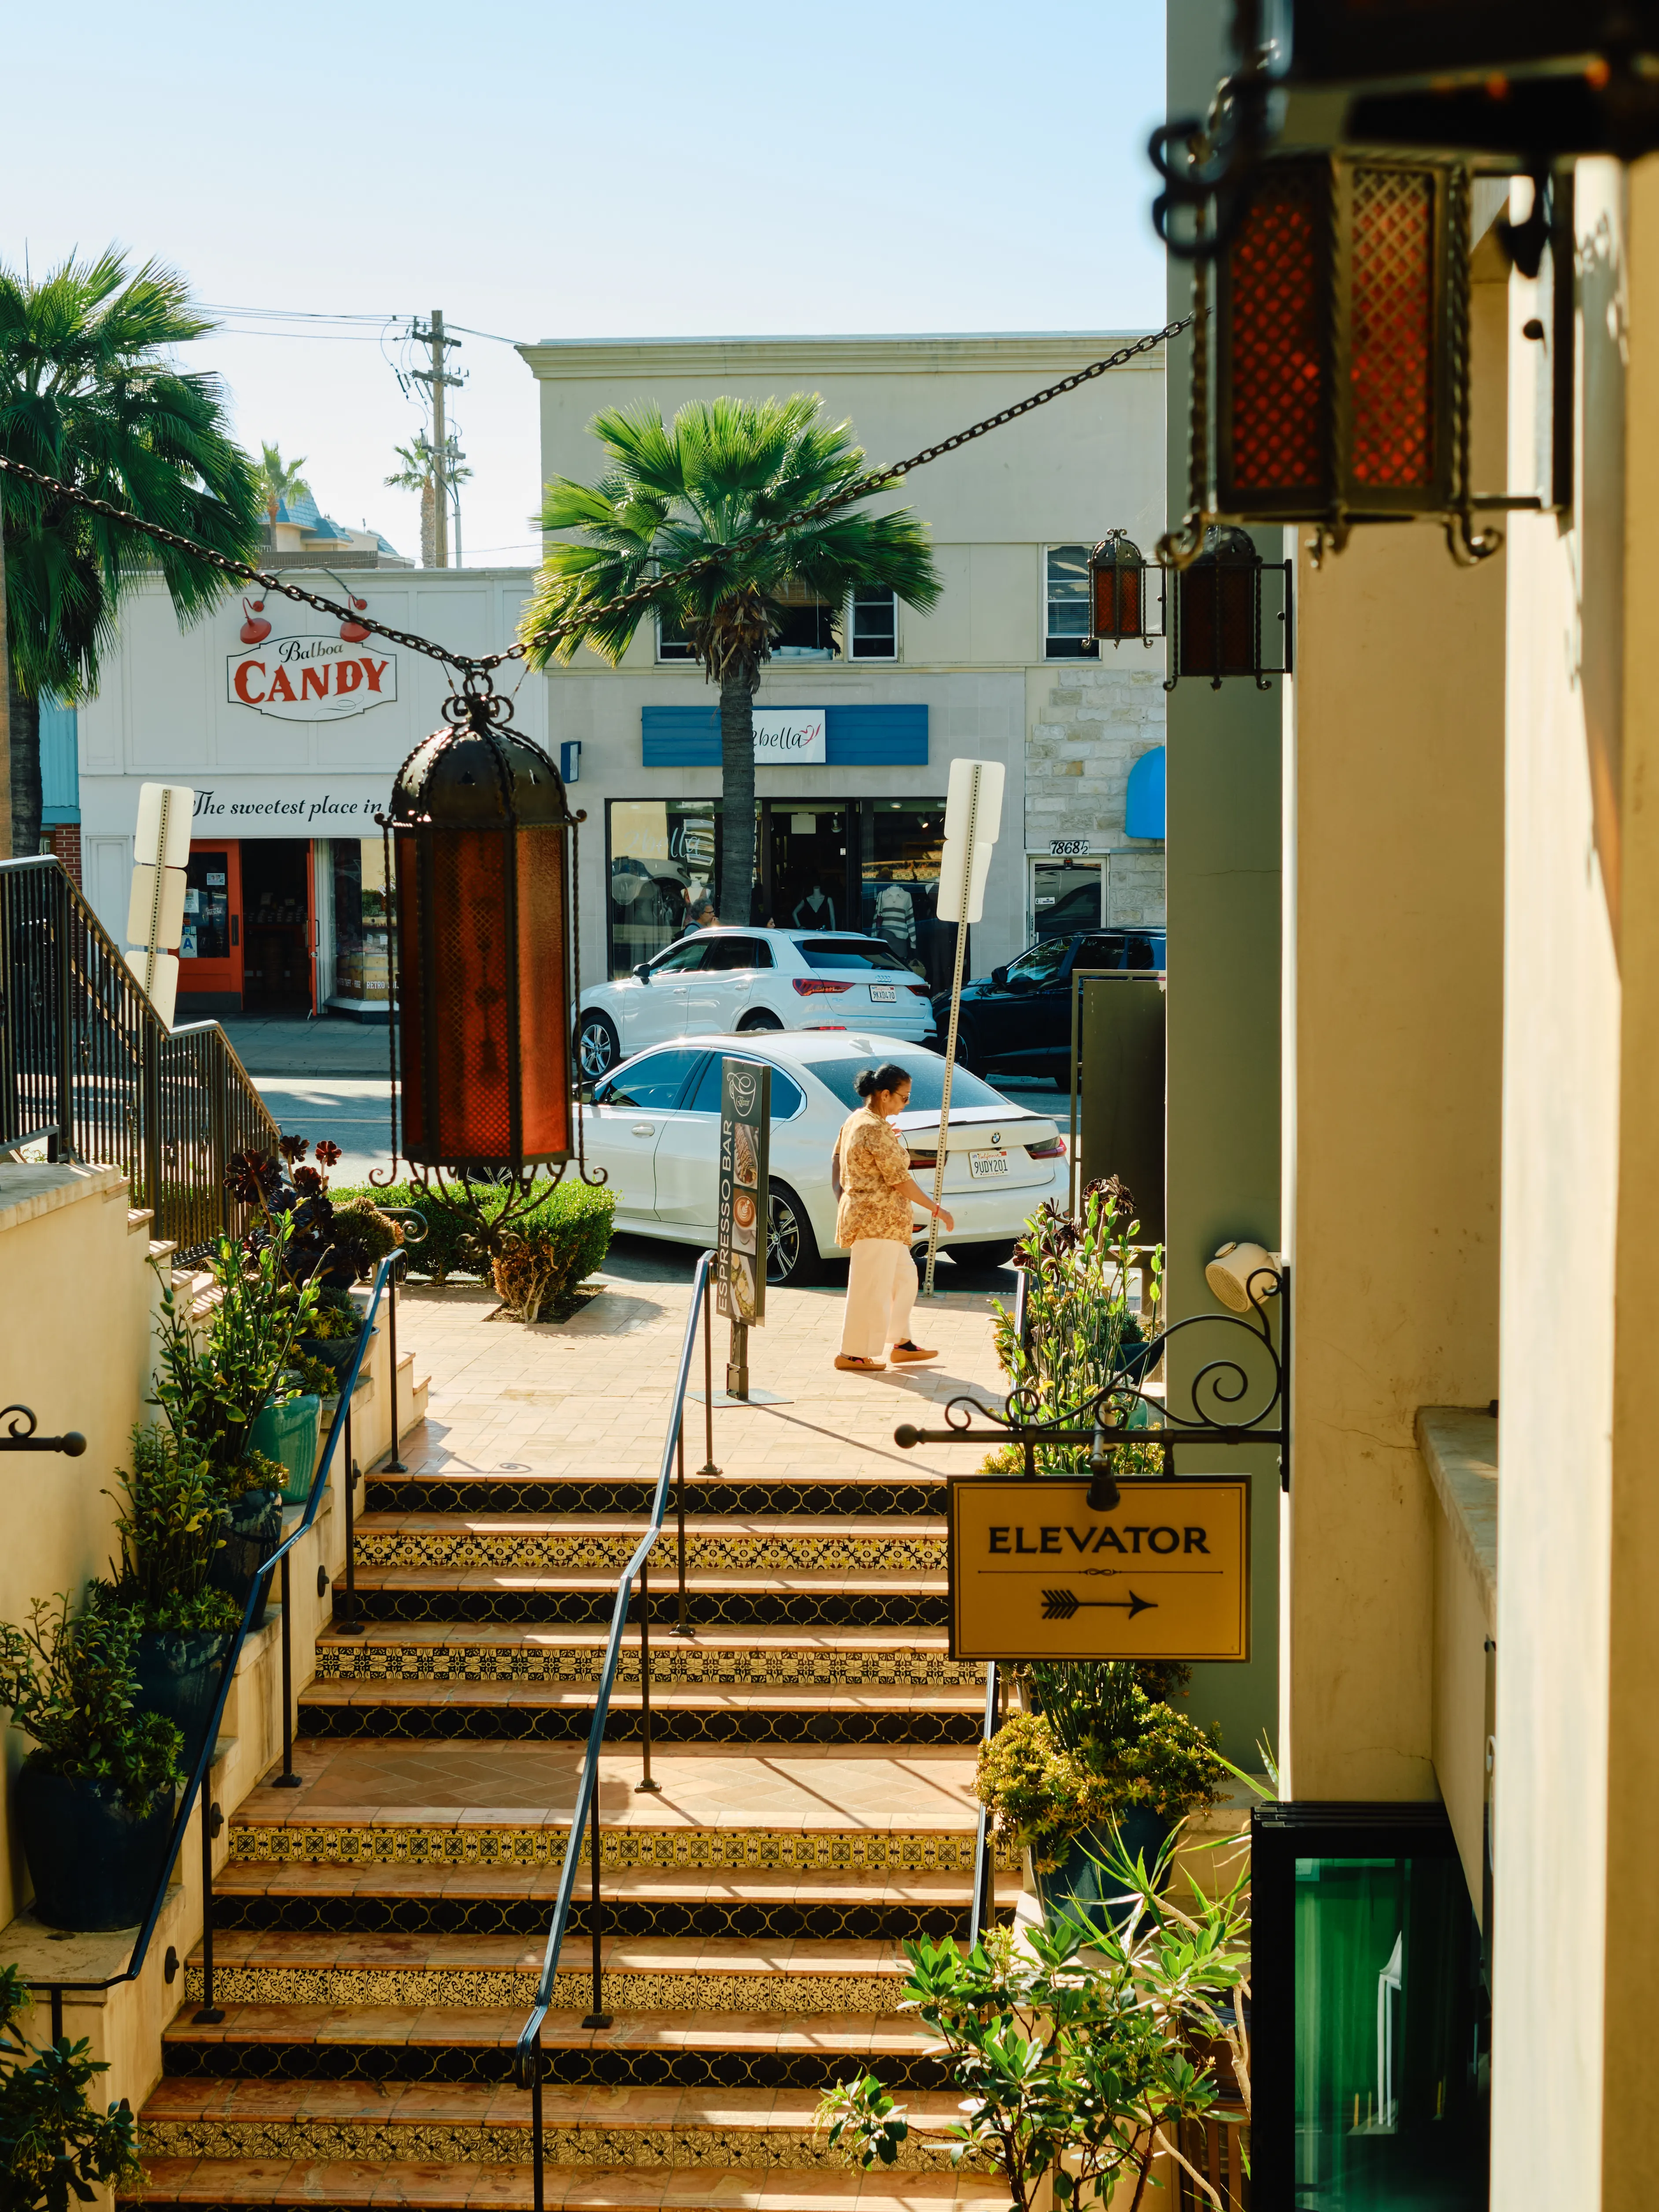
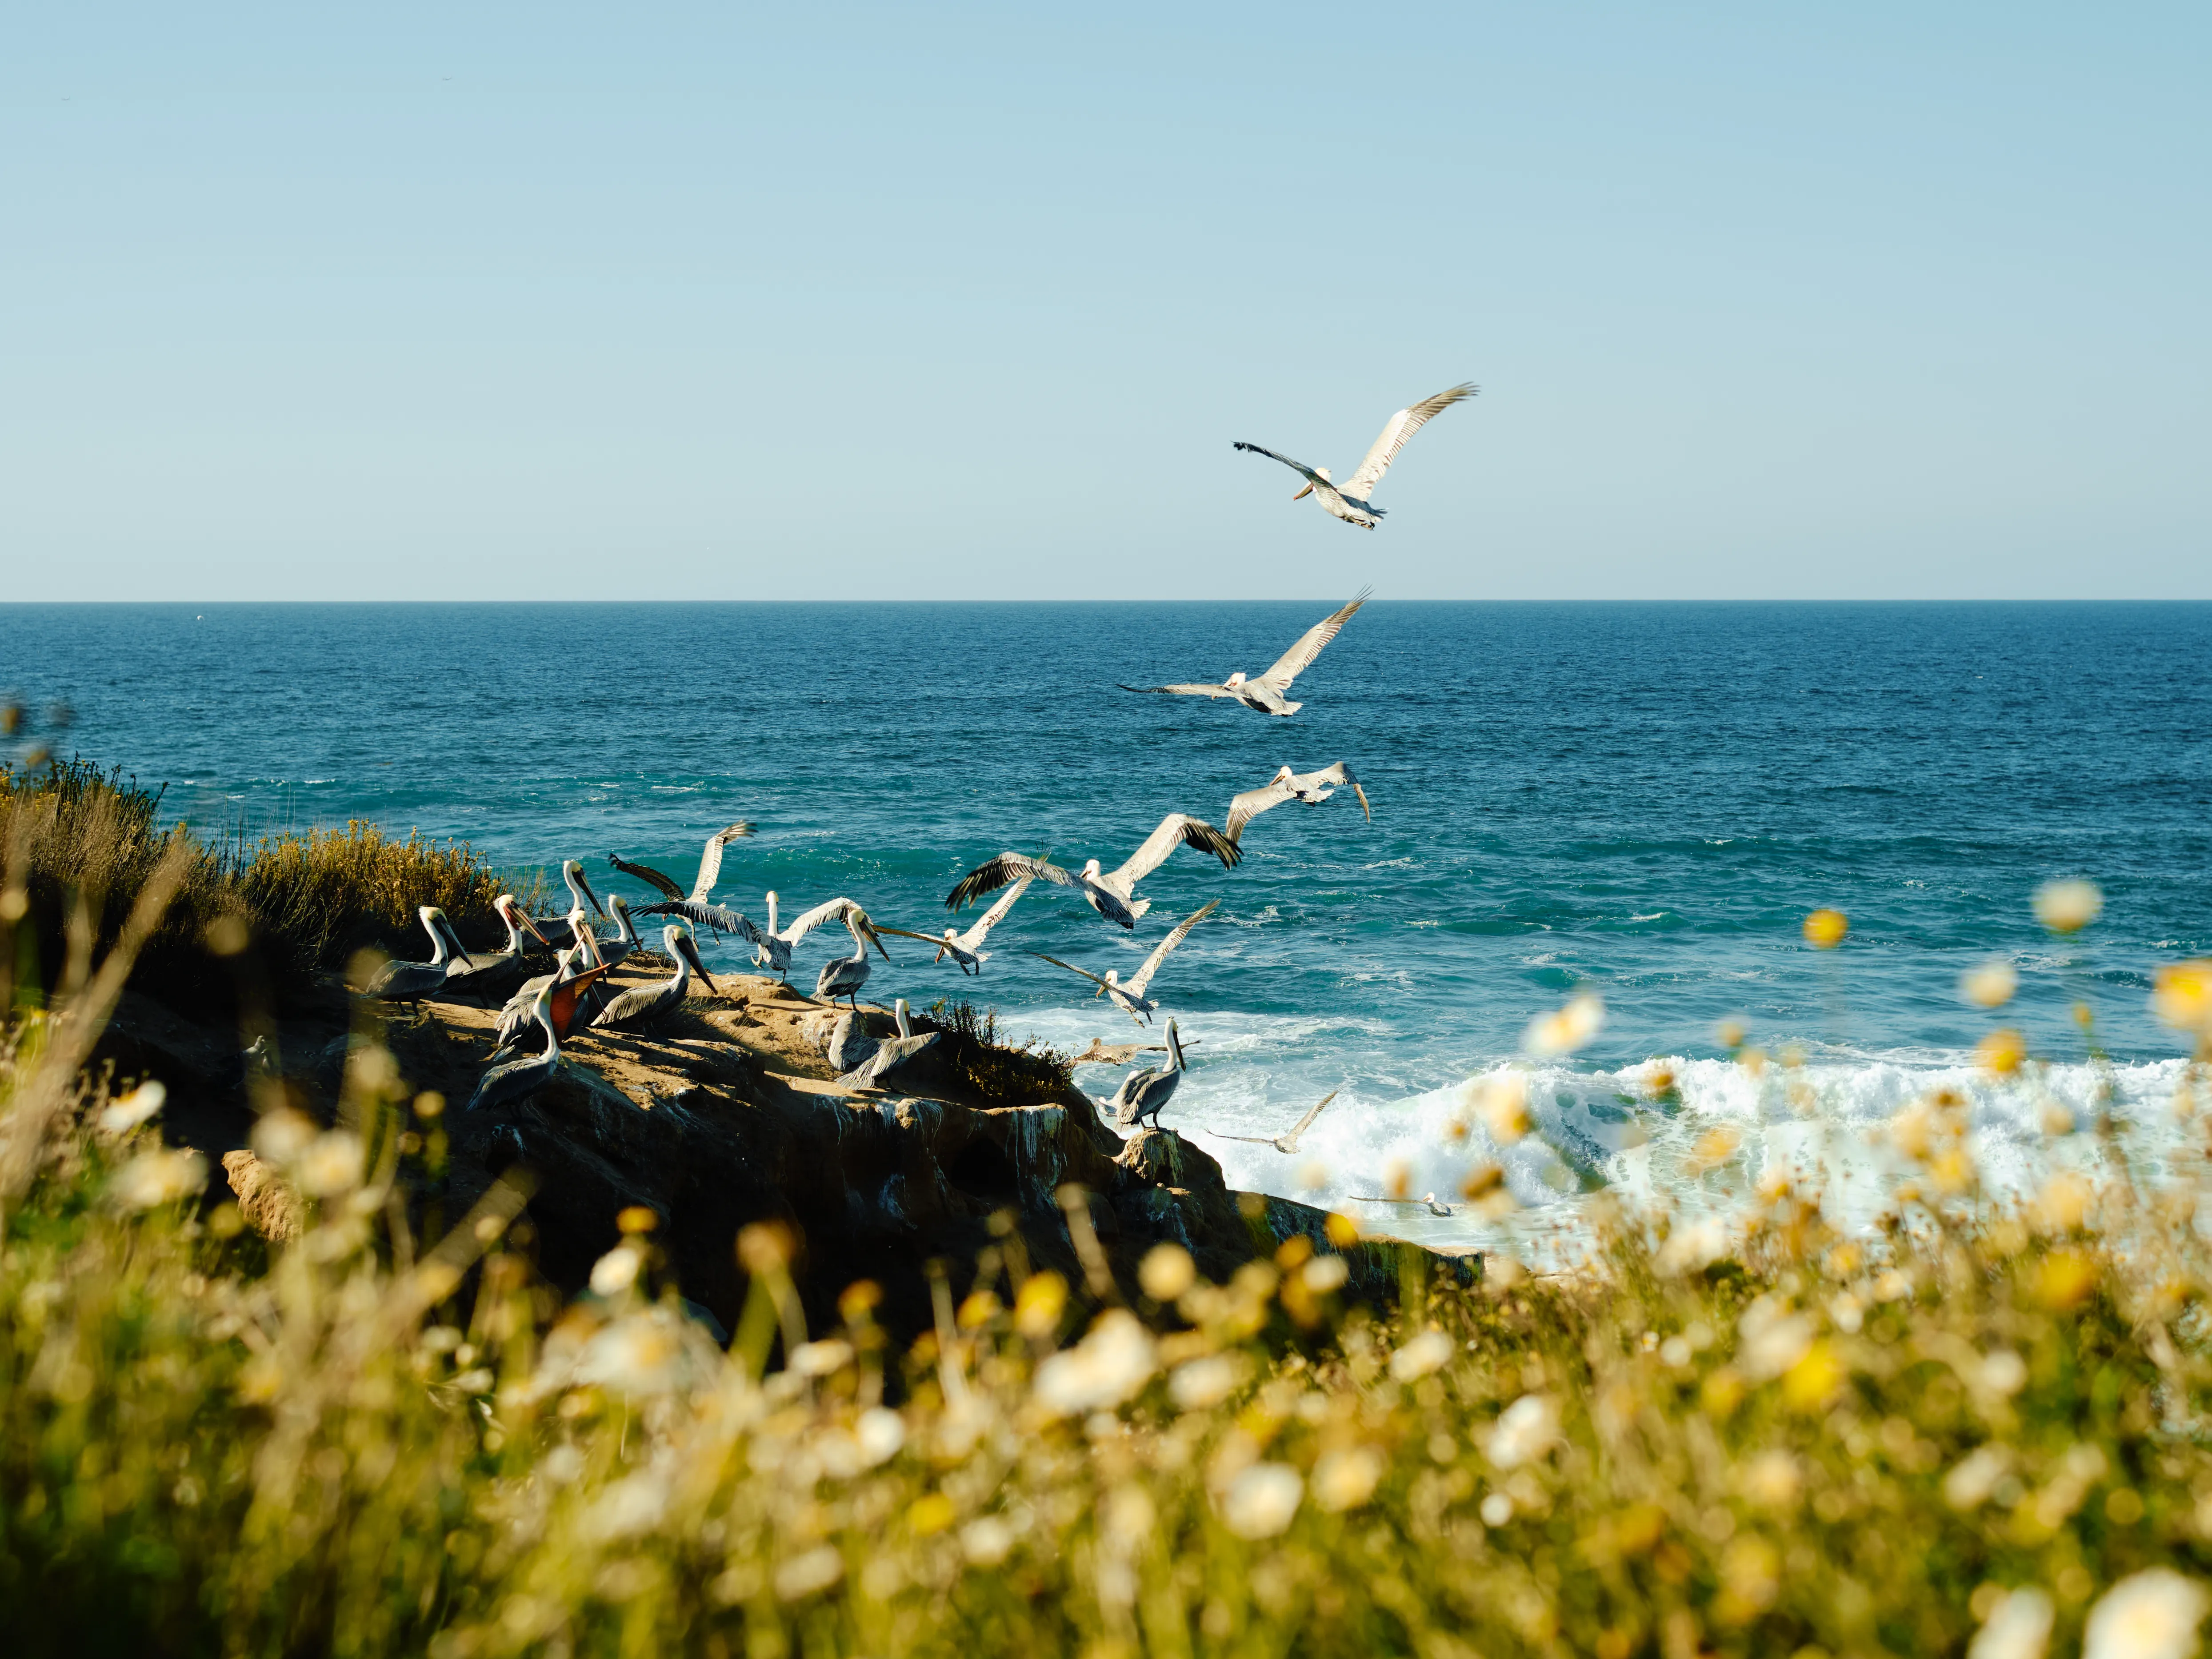
    I also had some time to walk around downtown La Jolla and took my FujiFilm X-T3 and my 35mm 1.4 lens for some street photography.

    La Jolla Street Sign

    Man on a bench in the sun

    Downtown San Diego alley

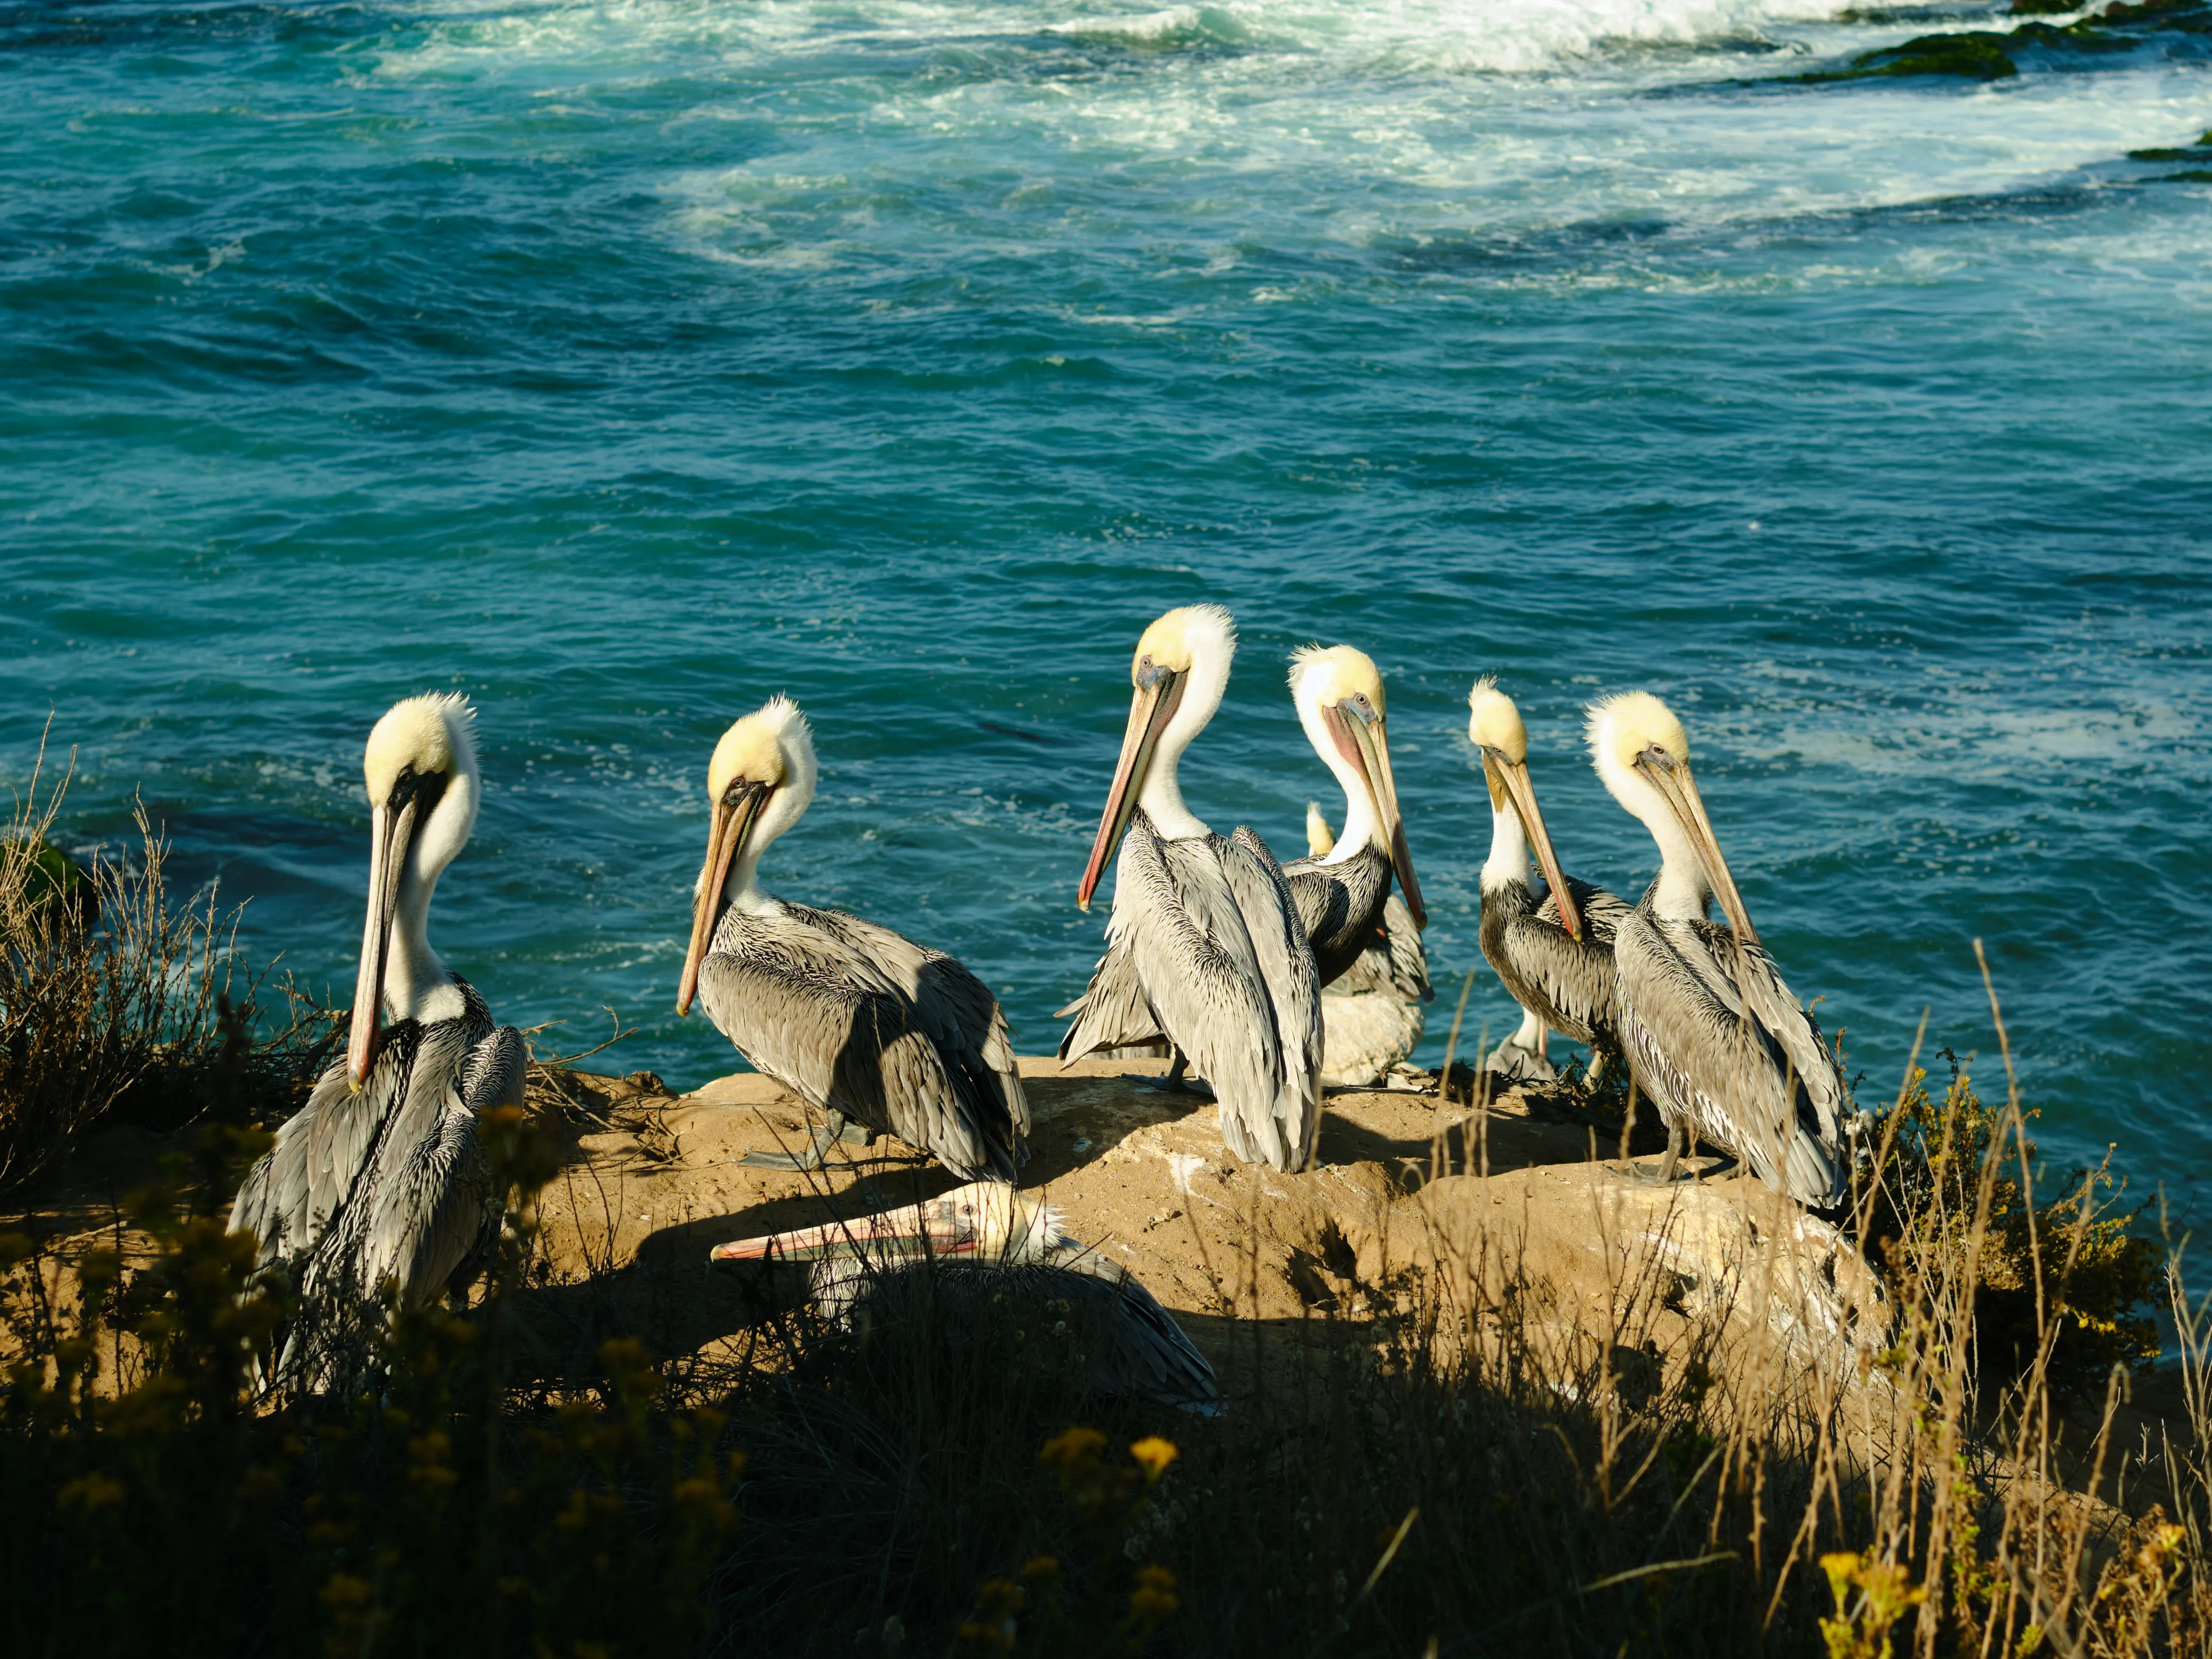
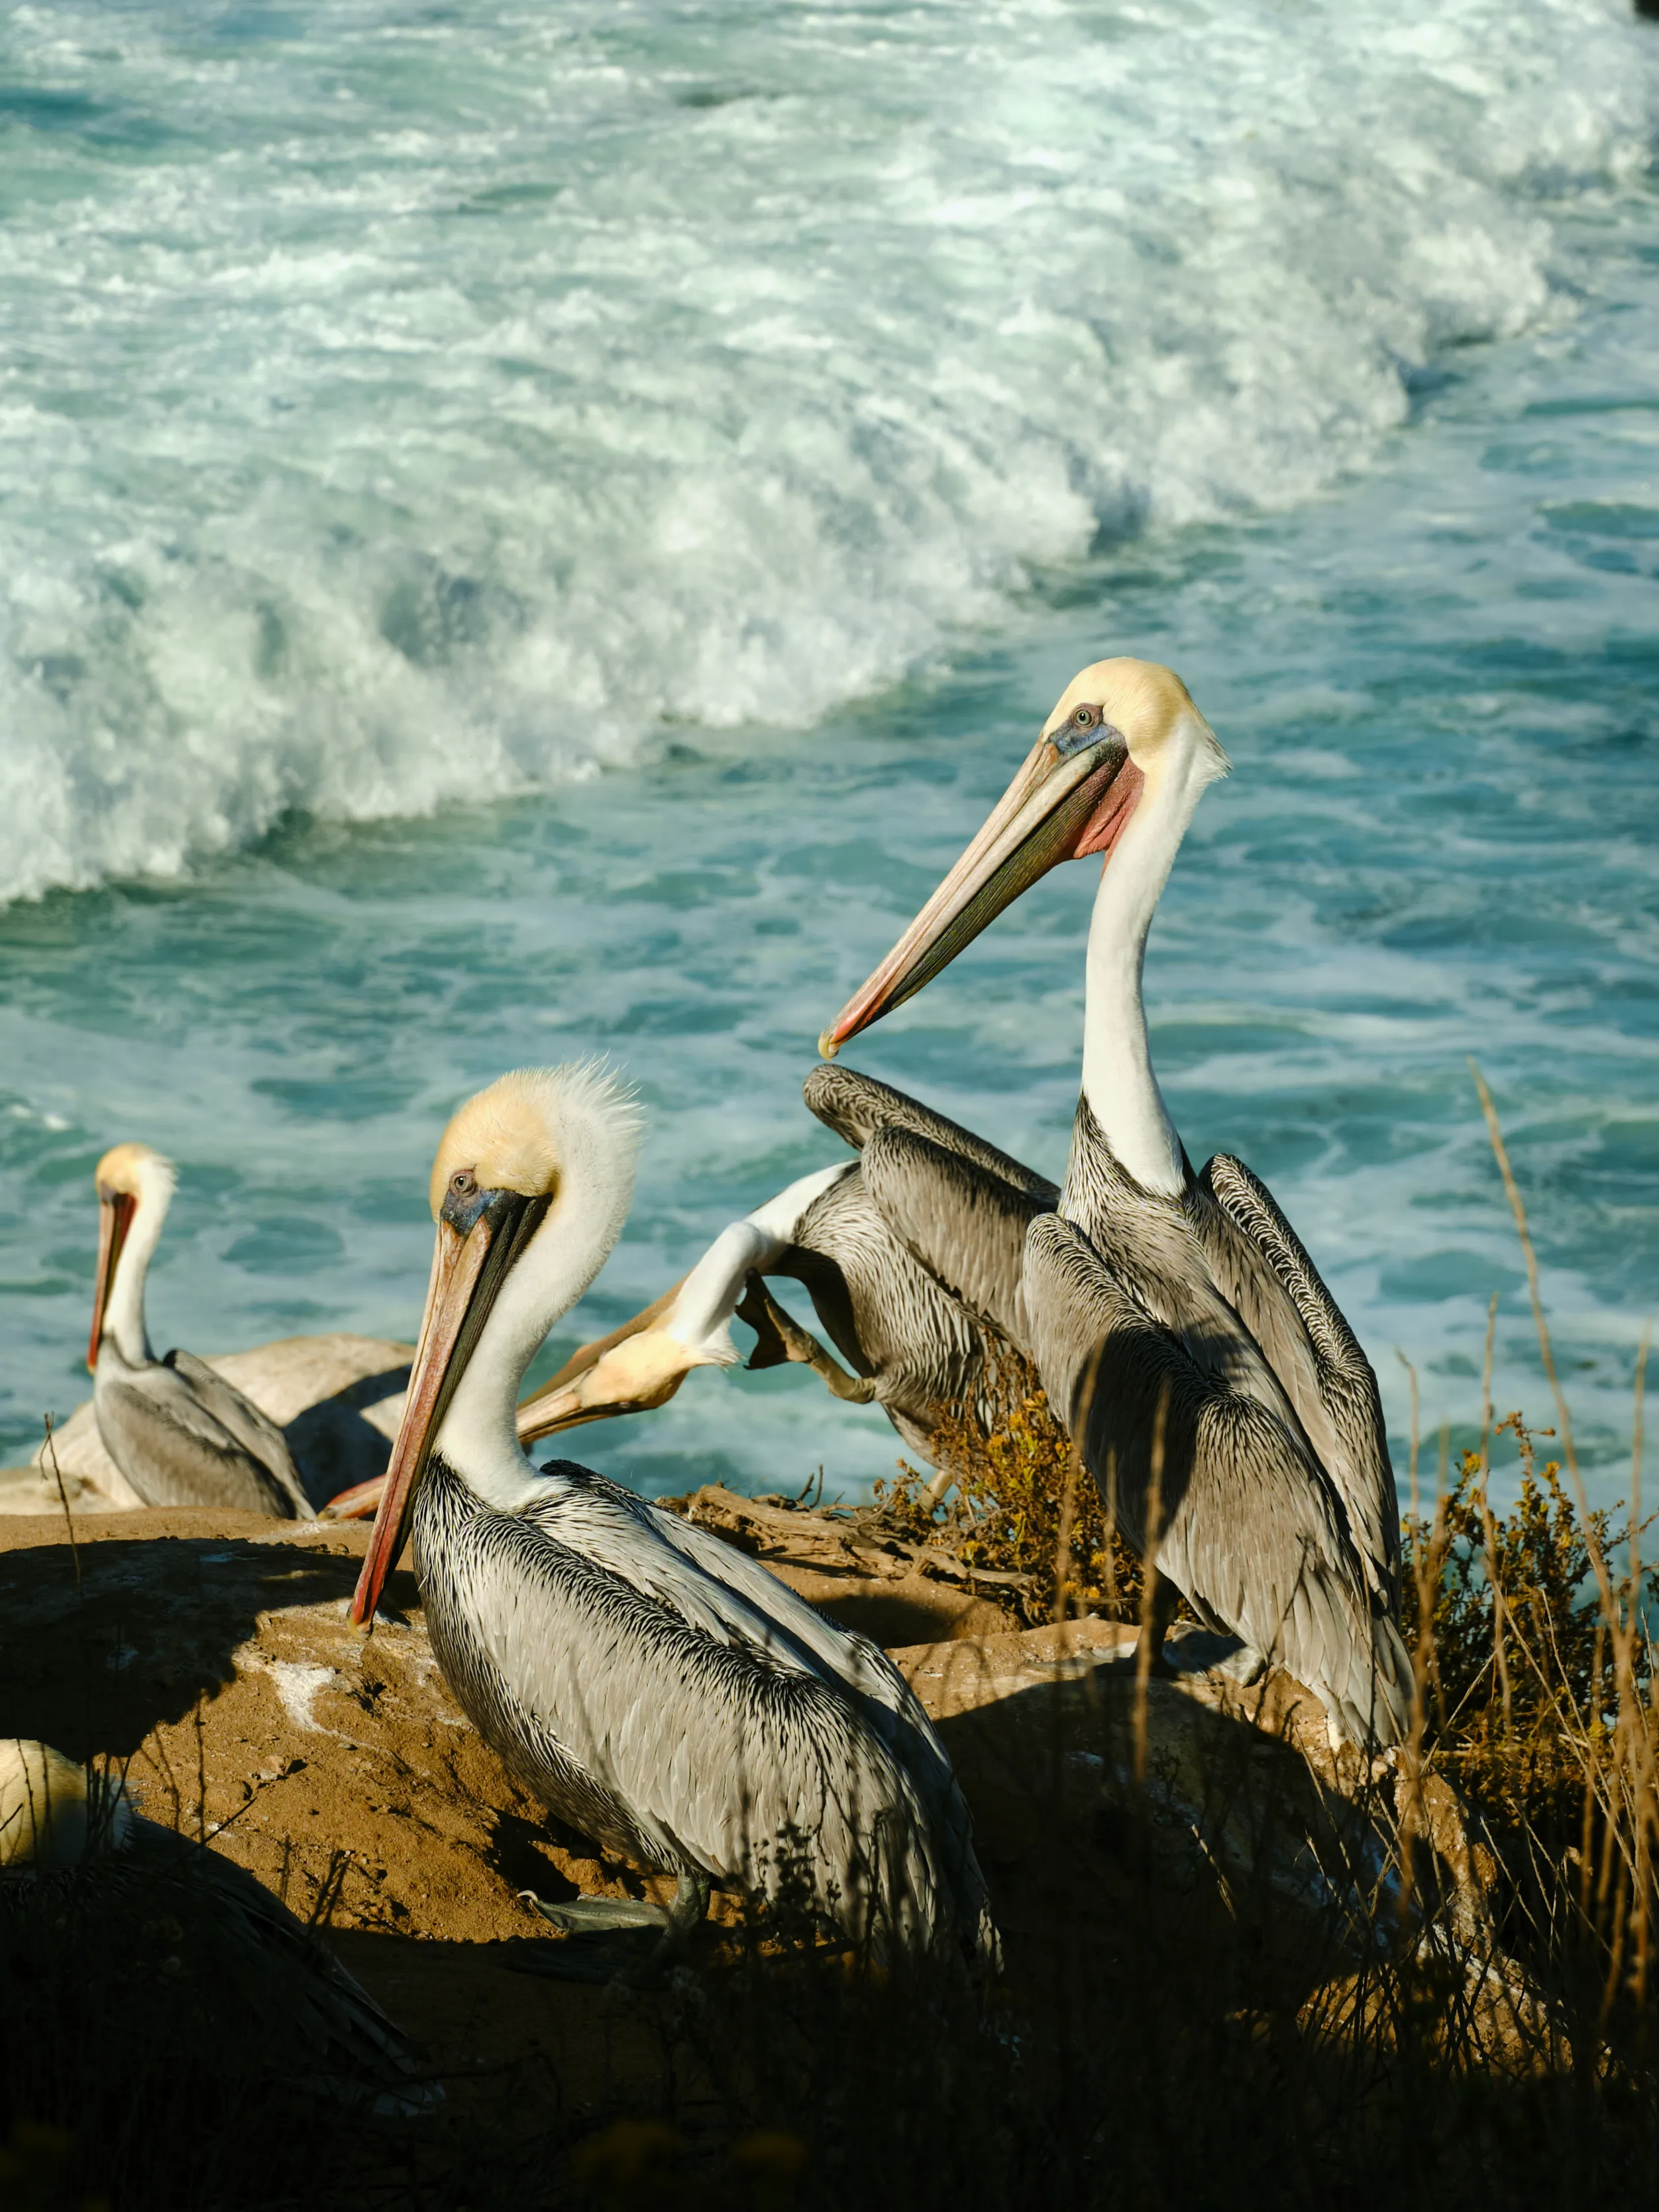
    Pelicans take flight over the ocean

    Pelicans perched on a seaside cliff

    Pelicans up close


  4. Dive #62 (2025): Pirate's Cove

    Dive log

    Stats

    • Max Depth: 19.3 m / 63 ft
    • Average Depth: 8.5 m / 28 ft
    • Duration: 47 minutes
    • Water Temp: 18.0°C / 64°F
    • Gas: EAN32
    • Tank(s): LP85
    • Pressure Start: 152 bar / 2200 psi
    • Pressure End: 55 bar / 800 psi
    • Surface Consumption Rate: 14.94 L/min / 0.53 cf/min

    Notes

    Final dive. Before entry, I realized the first stage of my Atomic regulator was leaking in a bad way. Had to use a spare regulator fromt he boat (which ironically was also an Atomic). Strange diving without my long-hose setup. We tried to fin around the point to the North, but the current kicked up quite a bit as we did so we retreated to the cove and spent the majority of our time in the shallows. Saw a playful harbor seal and found a small cavern along the shoreline. Lovely end to the day.


  5. Dive #61 (2025): Goat Harbor

    Dive log

    Stats

    • Max Depth: 19.3 m / 63 ft
    • Average Depth: 12.7 m / 42 ft
    • Duration: 49 minutes
    • Water Temp: 16.0°C / 61°F
    • Gas: EAN32
    • Tank(s): LP85
    • Pressure Start: 152 bar / 2200 psi
    • Pressure End: 55 bar / 800 psi
    • Surface Consumption Rate: 11.56 L/min / 0.41 cf/min

    Notes

    Second dive of the day. A place called Goat Harbor. Beauitful kelp forests abound. More horn sharks. A handful of moray eels. Some very large lobsters. Apparently this area is one of the more aggressive marine protected areas, even than adjacent areas around Catalina. In this area you can see Giant Sea Bass, but we weren’t that lucky on this dive.


  6. Dive #60 (2025): Nooks and Crannies

    Dive log

    Stats

    • Max Depth: 18.5 m / 61 ft
    • Average Depth: 8.9 m / 29 ft
    • Duration: 48 minutes
    • Water Temp: 17.0°C / 63°F
    • Gas: EAN32
    • Tank(s): LP85
    • Pressure Start: 138 bar / 2000 psi
    • Pressure End: 14 bar / 200 psi
    • Surface Consumption Rate: 18.34 L/min / 0.65 cf/min

    Notes

    First dive of the morning, I was excited to be back in Catalina for the Fall conditions after my dives here earlier this Spring, and the hopes of the fabled visibility. Truthfully, I didn’t feel like the visibility was significantly better, but I happy nonetheless. I buddied up with a local sport diver who turned out to have a great eye for finding things. This first dive we saw a small two-spot octopus, a horn-shark, and of course a myriad of reef fish. Stunning light coming through the kelp forests and a toasty 63 degree water. This was also my first real open-water dive using my new dry suit. Ended with quite low psi, but with the LP85 tanks the captain is OK draining down to 200 psi or so. My SAC rate wasn’t great, mostly as I was still figuring out the balance of air in my wing vs. drysuit.


  7. Reading: Co-Intelligence

    Reading Co-Intelligence by Ethan Mollick

    Cover of Co-Intelligence

    Two people I respect have recommended this book highly. Pandu Nayak and Harper Reed. I purchased this book earlier in the year but just digging in now.


  8. Dive #59 (2025): McAbee

    Dive log

    Stats

    • Max Depth: 8.6 m / 28 ft
    • Average Depth: 4.3 m / 14 ft
    • Duration: 7 minutes
    • Water Temp: 16.0°C / 61°F
    • Gas: EAN32
    • Tank(s): HP100
    • Pressure Start: 172 bar / 2500 psi
    • Pressure End: 152 bar / 2200 psi
    • Surface Consumption Rate: 24.90 L/min / 0.88 cf/min

    Notes

    Even shorter 2nd dive, if you can call it that. However, technically hit the requirements for the Drysuit course. Huzzah!

    Drained my tank to 500PSI to do a final buoyancy check with my HP100 tank. I dived with 16 pounds of weight (I’m typically at 12 in my 7mm semidry). Needed 2 more pounds after the final weight check. So, with current undergarments ideal weight for me is ~18 pounds.

    With the drysuit, may decide to switch to my stainless steel backplate. That would mean I need to carry 12 pounds of weight, but would need to work out how much has to be ditchable. Currently I dive with 4 pounds ditchable and I can comfortably stay at the surface with a failed wing with 8 pounds still attached.

    I believe the rule of thumb is a competent diver that is properly weighted can remain at the surface with 10 pounds of residual negative buoyancy in the event of a wing failure.


  9. Dive #58 (2025): McAbee

    Dive log

    Stats

    • Max Depth: 8.3 m / 27 ft
    • Average Depth: 5.6 m / 18 ft
    • Duration: 24 minutes
    • Water Temp: 15.0°C / 59°F
    • Gas: EAN32
    • Tank(s): HP100
    • Pressure Start: 241 bar / 3500 psi
    • Pressure End: 172 bar / 2500 psi
    • Surface Consumption Rate: 22.25 L/min / 0.79 cf/min

    Notes

    First open water dive for my PADI Drysuit course. At McAbee. Visibility was, without exageration, under 5’.

    So stoked to finally be in a drysuit (although ironic today was the warmest day in Monterey I’ve dived this year). Our instructor tried to take us out to the pinnacle that sits offshore at about a 32 degree heading. Kicked insanely fast, hence the high SCR.

    Had to don and doff my BP/W at the surface, as well as disconnect and reconnect the drysuit inflator hose.

    Called dive short given such poor visibility.


  10. Dive #57 (2025): Diver Dans Pool

    Dive log

    Stats

    • Max Depth: 3.0 m / 10 ft
    • Average Depth: 2.1 m / 7 ft
    • Duration: 16 minutes
    • Water Temp: 29.0°C / 84°F
    • Gas: EAN0
    • Tank(s): HP100
    • Pressure Start: N/A
    • Pressure End: N/A
    • Surface Consumption Rate: N/A

    Notes

    Pool session for my PADI Drysuit course, at Diver Dans. Excited to be in a drysuit finally. Not excited to wear a drysuit with full undergarments in an 86 degree pool.


  11. Dive #56 (2025): Cathedrals

    Dive log

    Stats

    • Max Depth: 25.4 m / 83 ft
    • Average Depth: 17.8 m / 58 ft
    • Duration: 56 minutes
    • Water Temp: 12.0°C / 54°F
    • Gas: EAN32
    • Tank(s): HP100
    • Pressure Start: 234 bar / 3400 psi
    • Pressure End: 34 bar / 500 psi
    • Surface Consumption Rate: 15.51 L/min / 0.55 cf/min

    Notes

    Second dive of the day aboard the Escapade, following the morning dive at McDonald’s. The group decided to keep the swim-through theme going and opted for Cathedral, a site just offshore of Pescadero Point on 17-Mile Drive.

    We descended the mooring line and dropped straight to 55 feet, finding the first swim-through almost immediately. It was a bit narrower than the ones at McDonald’s but still had plenty of room to navigate. After exiting, we spent some time exploring the rock wall. About 30 minutes in, having spent most of the dive below 60 feet, I was definitely starting to feel the cold.

    I was about to signal to my buddy that I was ready to ascend when another diver motioned that they’d found a second swim-through. We finned over to explore it, then began a slow ascent back to the boat. I was definitely cold by the end, and my gas consumption proved it: my SCR notched up to 55 cf/min, way higher than my typical rate.


  12. Dive #55 (2025): McDonalds

    Dive log

    Stats

    • Max Depth: 30.0 m / 98 ft
    • Average Depth: 20.7 m / 68 ft
    • Duration: 31 minutes
    • Water Temp: 12.0°C / 54°F
    • Gas: EAN32
    • Tank(s): HP100
    • Pressure Start: 234 bar / 3400 psi
    • Pressure End: 103 bar / 1500 psi
    • Surface Consumption Rate: 16.63 L/min / 0.59 cf/min

    Notes

    After not making it around Point Pinos the past weekend, I was stoked to finally make it to the Carmel side. While I’ve dived at Point Lobos and Monastery, this was my first boat dive on the Carmel side of the Monterey coast. Given the calm conditions, a few of the more experienced BAUE divers and the captain decided on a spot that hadn’t been visited in a while: McDonald’s. South of Point Lobos, this dive site features a couple of beautiful swim-throughs, starting in about 70’ of water. Anchoring here is tricky, with the boat sitting just outside a submerged rock. The captain gave us a briefing on what to do if the anchor slips during our dive.

    The swim-throughs were incredible—small enough to require careful finning but large enough to give a gorgeous view out the other side. This was helped by great visibility, up to 40’ at times.

    The kelp was thinner than I expected, something the crew attributed to a healthy urchin population. Still, we found a large school of rockfish in the shallows around 30 feet, plus plenty of crabs and nudibranchs throughout the rock formations. We had to cut the dive a bit short after a buddy’s Shearwater transmitter stopped working. With no backup pressure gauge, it was the right and only call to make. Honestly, being the only one in a wetsuit, I wasn’t upset about heading up before the cold really started to set in.


  13. Dive #54 (2025): Eric's Pinnacle

    Dive log

    Stats

    • Max Depth: 18.7 m / 61 ft
    • Average Depth: 12.5 m / 41 ft
    • Duration: 52 minutes
    • Water Temp: 12.0°C / 54°F
    • Gas: EAN32
    • Tank(s): HP100
    • Pressure Start: 241 bar / 3500 psi
    • Pressure End: 103 bar / 1500 psi
    • Surface Consumption Rate: 14.27 L/min / 0.50 cf/min

    Notes

    No notes recorded for this dive.


  14. Dive #53 (2025): Redfish Ridge

    Dive log

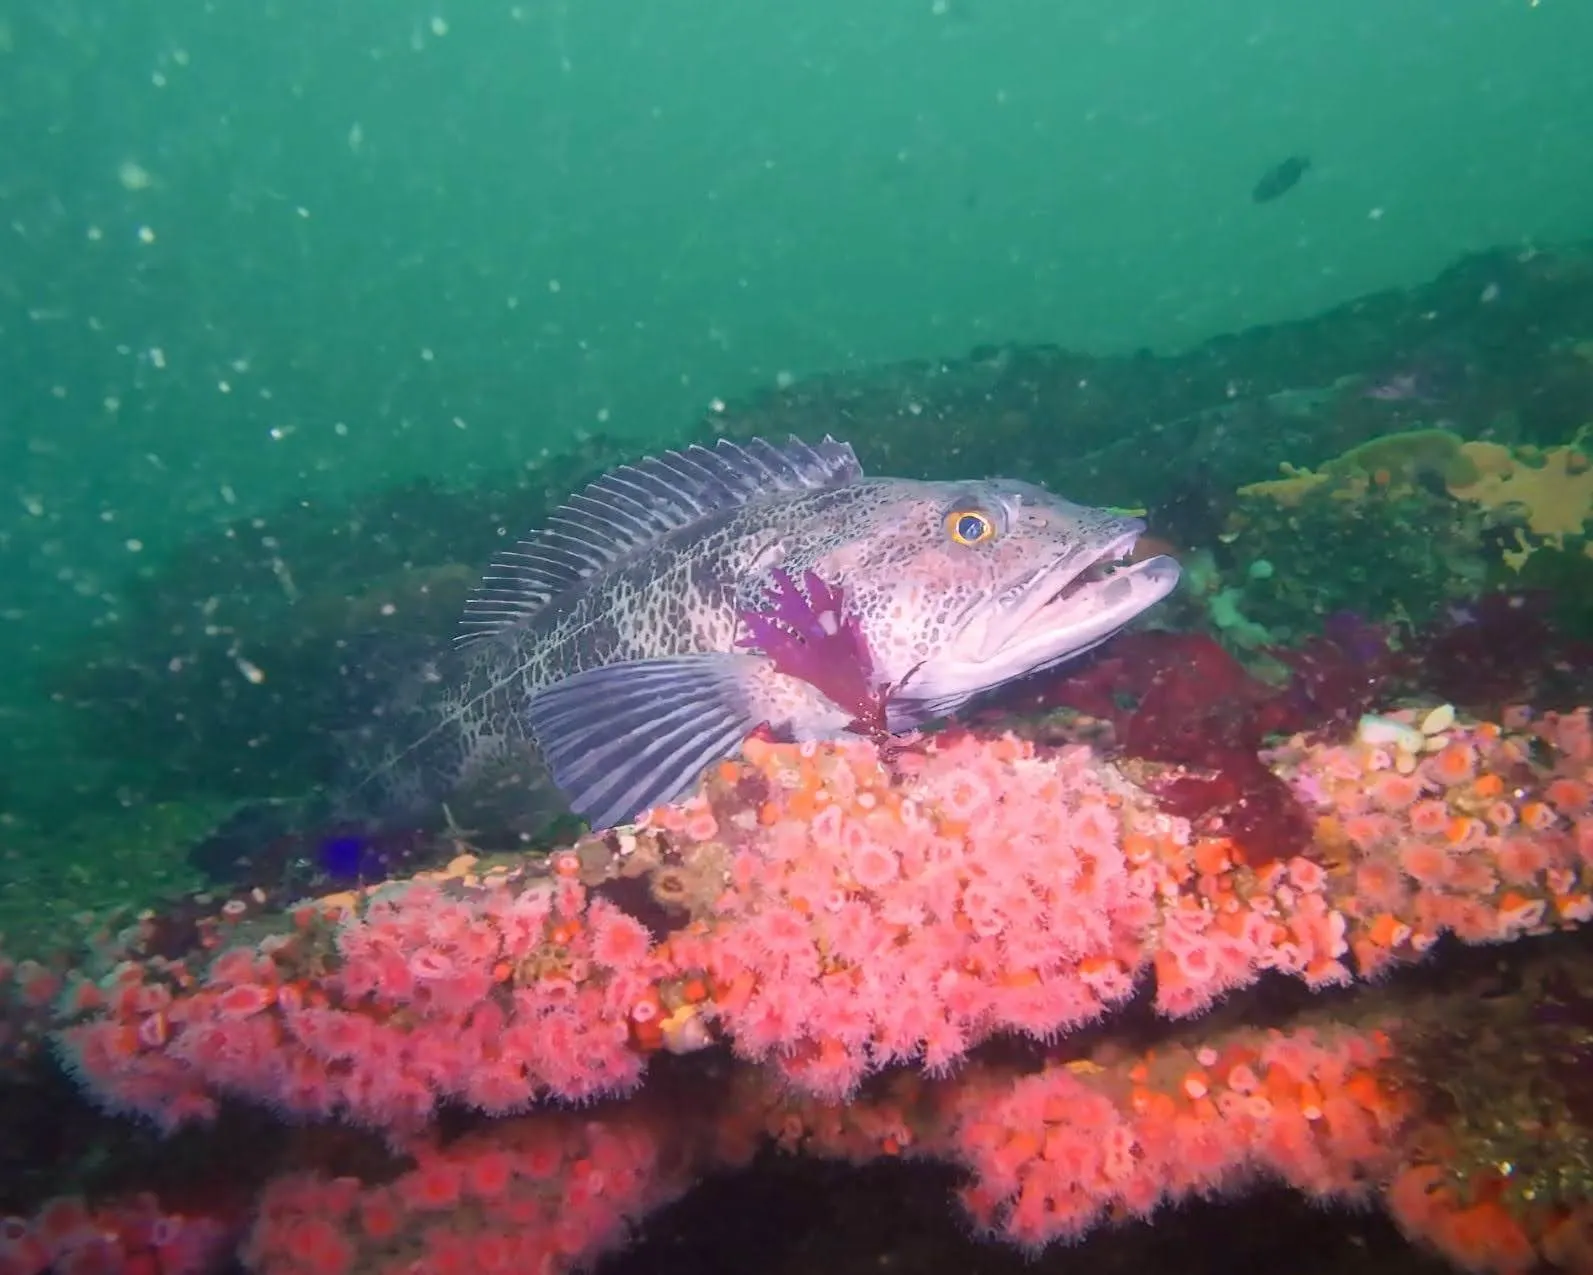
    A lincod at Redfish Ridge

    Stats

    • Max Depth: 21.3 m / 70 ft
    • Average Depth: 17.8 m / 58 ft
    • Duration: 46 minutes
    • Water Temp: 12.0°C / 54°F
    • Gas: EAN32
    • Tank(s): HP100
    • Pressure Start: 241 bar / 3500 psi
    • Pressure End: 69 bar / 1000 psi
    • Surface Consumption Rate: 16.28 L/min / 0.57 cf/min

    Notes

    First dive of the day from the Escapade with BAUE. We tried to make it around to Carmel but turned back to due larger than expected swells right at the navigational buoy marking Point Pinos. Oh well, we’ll get there eventually. Had a more successful dive here than my first time around. Lots of Redfish (what a shock!), lincold, copper rockfish, vermillion rockfish, and more.


  15. Building An Automated Photo Gallery With Astro.js

    When I rebuilt my website using Astro.js, a primary goal was to make publishing my photos easier. Because of the ease of publishing on social media platforms, I had fallen into the trap of only posting there. Inevitably, when you post on social media, you evaluate your work through the lens of engagement. This is not my goal. I create photos for myself. For the sake of the creative process. And to watch my progress over time.

    The majority of my photo workflow is in Capture One, my favorite RAW editor. It occurred to me: why can’t I just export a photo from Capture One and have it publish to my website?. So I set off to build that workflow as closely as possible.

    My goals were:

    1. Organize my photos into galleries for frequent subjects like Landscapes or Birds & Wildlife
    2. Give each photo a permanent URL to make it easy to share and link to
    3. Publish EXIF data with my photos

    While I don’t have a computer science background, I’m quite happy with the solution I built. I’m sure the code below could be improved (please share if you have ideas!). But for now, this code works well for me and provides a starting point for anyone interested in a similar setup.

    The Code

    The system has three components:

    1. A nodemon process that watches for changes to my src/photography directory
    2. A JavaScript script that reads EXIF data from an image, and is called by nodemon when a new image is detected. This script saves EXIF data to a json file that Astro.js files are able to process
    3. Astro.js templates that render a gallery (e.g. landscapes) and a single image view for each photo

    Let’s go through them step-by-step.

    package.json

    The process begins with nodemon, a simple utility that uses concurrently to watch for new images in my src/photography directory. As soon as a new image appears (e.g. .jpg), it triggers the automation.

    {
      "name": "astro-photography-site",
      "type": "module",
      "version": "1.0.0",
      "scripts": {
        "dev": "concurrently \"astro dev\" \"nodemon -L --watch 'src/photography/**' --ext 'jpg,jpeg,png,gif' --exec 'node image-exif.js'\"",
        "build": "astro build",
        "preview": "astro preview"
      },
      "dependencies": {
        "@astrojs/mdx": "^4.1.0",
        "astro": "^5.3.1",
        "exifreader": "^4.26.1"
      },
      "devDependencies": {
        "concurrently": "^9.1.2",
        "nodemon": "^3.1.9"
      }
    }

    Extracting metadata from images

    This is where the system becomes an extension of my editing workflow. After nodemon invokes the script, it recursively walks through the src/photography directory and uses the exifreader library to pull out the metadata I’ve already embedded in Capture One. The script then writes all of that data to a single JSON file, src/image-data.json, which becomes our on-disk database. This gives Astro.js everything it needs to render rich, dynamic templates.

    import * as fs from 'node:fs/promises';
    import path from 'node:path';
    import { fileURLToPath } from 'url';
    import { createRequire } from 'module';
    const require = createRequire(import.meta.url);
    const EXIF = require('exifreader');
    
    /**
     * Extracts EXIF data from an image file.
     * @param {string} imagePath - The path to the image file.
     * @returns {Promise<object|null>} The EXIF tags or null if an error occurs.
     */
    async function extractEXIFData(imagePath) {
        try {
            const imageBuffer = await fs.readFile(imagePath);
            const tags = EXIF.load(imageBuffer);
            return tags;
        } catch (error) {
            console.error(`Error processing ${imagePath}:`, error);
            return null;
        }
    }
    
    /**
     * Traverses the photography directory, extracts EXIF data, and writes it to a JSON file.
     */
    async function processImages() {
        const imageData = {};
        const photographyDir = 'src/photography';
        const outputFilePath = 'src/image-data.json';
    
        async function traverseDir(dir) {
            const files = await fs.readdir(dir, { withFileTypes: true });
    
            for (const file of files) {
                const fullPath = path.join(dir, file.name);
    
                if (file.isDirectory()) {
                    await traverseDir(fullPath); // Recursive call for subdirectories
                } else if (/\.(jpg|jpeg|png|gif)$/i.test(file.name)) {
                    const exifData = await extractEXIFData(fullPath);
                    if (exifData) {
                        imageData[fullPath] = exifData;
                    }
                }
            }
        }
    
        await traverseDir(photographyDir);
    
        await fs.writeFile(outputFilePath, JSON.stringify(imageData, null, 2));
        console.log(`EXIF data written to ${outputFilePath}`);
    }
    
    processImages();

    With the JSON file in place, Astro components can read that data and use it to display content.

    The gallery page uses import.meta.glob to find all of the images within a given gallery directory (e.g. landscapes or travel) and then uses the image path to look up the correct EXIF data from our JSON file.

    ---
    import { Picture } from 'astro:assets';
    import imageData from '../../image-data.json';
    
    // Get a list of all images from the "photography" directory.
    const allImages = import.meta.glob<{ default: ImageMetadata }>('../../photography/*/*.{jpg,jpeg,png,gif}', { eager: true });
    
    // Process the image list to be used in the template.
    const imageList = Object.keys(allImages).map(path => {
      const imageModule = allImages[path];
      const parts = path.split('/');
      const slugWithExtension = parts.pop();
      const slug = slugWithExtension ? slugWithExtension.split('.')[0] : '';
      const alt = slug || "Gallery Image";
    
      return {
        src: imageModule.default,
        alt: alt,
        slug: slug,
        imagePath: `src/photography/${parts.pop()}/${slugWithExtension}`,
      };
    });
    
    // Define a type for the imageData JSON
    interface ImageData {
      [key: string]: {
        Headline?: {
          description?: string;
        };
        [key: string]: any;
      };
    }
    const typedImageData: ImageData = imageData;
    
    function getImageOrientation(width: number, height: number): 'portrait' | 'landscape' {
      return width > height ? 'landscape' : 'portrait';
    }
    ---
    
    <h1>My Photo Gallery</h1>
    <ul class="photo-grid">
      {imageList.map((image) => {
        const imageEXIF = typedImageData[image.imagePath];
        const orientation = getImageOrientation(image.src.width, image.src.height);
    
        return (
          <li class={`photo-item ${orientation}`}>
            <a href={`/photography/${image.slug}/`}>
              <figure>
                <Picture src={image.src}
                         formats={['avif', 'webp']}
                         alt={imageEXIF?.Headline?.description ?? 'View'} />
                <figcaption>
                  {imageEXIF?.Headline?.description ?? 'View Image'}
                </figcaption>
              </figure>
            </a>
          </li>
        );
      })}
    </ul>

    Single Image View

    It’s important to me that each image has a permanent URL so I can easily link to the image from elsewhere. Such as:

    https://conragan.com/photography/birds-wildlife/coyote-stalking/

    The code that handles that page is:

    ---
    import { Image } from 'astro:assets';
    import imageData from '../../../image-data.json';
    
    // Get the props passed from getStaticPaths.
    const { slug, imagePath, imageModule } = Astro.props;
    
    const typedImageData = imageData as any;
    
    // Retrieve image EXIF data using the imagePath.
    const imageEXIF = typedImageData[imagePath];
    ---
    
    <div id="photo-container">
      <div id="photo-image">
        <Image src={imageModule.default} alt={imageEXIF?.Headline?.description ?? slug} width="1200"/>
      </div>
      <div id="photo-content">
        <h1 class="photo-title">{imageEXIF?.Headline?.description ?? slug}</h1>
        <dl id="exif">
          {imageEXIF?.Make?.description && (
            <>
              <dt>Camera</dt>
              <dd>{imageEXIF.Make.description} {imageEXIF.Model?.description}</dd>
            </>
          )}
          {imageEXIF?.LensModel?.description && (
            <>
              <dt>Lens</dt>
              <dd>{imageEXIF.LensModel.description}</dd>
            </>
          )}
          {imageEXIF?.FocalLength?.description && (
            <>
              <dt>Focal Length</dt>
              <dd>{imageEXIF.FocalLength.description}</dd>
            </>
          )}
          {imageEXIF?.FNumber?.description && (
            <>
              <dt>Aperture</dt>
              <dd>{imageEXIF.FNumber.description}</dd>
            </>
          )}
          {imageEXIF?.ExposureTime?.description && (
            <>
              <dt>Exposure Time</dt>
              <dd>{imageEXIF.ExposureTime.description}</dd>
            </>
          )}
          {imageEXIF?.ISOSpeedRatings?.description && (
            <>
              <dt>ISO</dt>
              <dd>{imageEXIF.ISOSpeedRatings.description}</dd>
            </>
          )}
          {imageEXIF?.DateTimeOriginal?.value && (
            <>
              <dt>Captured</dt>
              <dd>{imageEXIF.DateTimeOriginal.value[0]}</dd>
            </>
          )}
        </dl>
      </div>
    </div>

    That’s the system in full. I’ve simplified some of the examples above by removing extra code pertaining to style and presentation. If you want to view the code in full, head on over to my Github repo. If you end up using this, I’d love to hear about it and check out your photography as well!

    In a future blog post I’ll cover how I handle some of the front-end rendering. In particular how I was able to provide responsive layouts for different clients, as well as how I used JavaScript to provide streamlined navigation.


  16. Reading: Yumi and the Nightmare Painter

    Reading Yumi and the Nightmare Painter by Brandon Sanderson

    Cover of Yumi and the Nightmare Painter

    When you finish a Brandon Sanderson book, it’s hard to leave the Cosmere. After Wind and Truth, picking up one of the Secret Projects books (I absolutely loved Tress of the Emerald Sea last year).


  17. Dive #52 (2025): Breakwater Beach

    Dive log

    Stats

    • Max Depth: 6.3 m / 21 ft
    • Average Depth: 2.7 m / 9 ft
    • Duration: 10 minutes
    • Water Temp: 14.0°C / 57°F
    • Gas: EAN32
    • Tank(s): HP100
    • Pressure Start: N/A
    • Pressure End: N/A
    • Surface Consumption Rate: N/A

    Notes

    No notes recorded for this dive.